
Installation Guide: How to Build with Recycled Plastic Lumber
Recycled plastic lumber offers incredible durability and zero maintenance, but working with it requires slightly different techniques than traditional timber. This comprehensive guide covers everything you need to know—from cutting and drilling to fastening and finishing—to ensure your recycled plastic project lasts 50+ years.
Understanding Recycled Plastic Lumber
Material Properties
- 100% recycled HDPE (high-density polyethylene)
- Solid core throughout (no hollow chambers)
- Thermal expansion: ~2× timber (but still minimal)
- Weight: ~1.5× timber equivalent
- Flexibility: Slightly more flexible than hardwood
Key Differences from Timber
| Property | Timber | Recycled Plastic | | ------------------ | ----------- | ---------------------------- | | Pre-drilling | Optional | Always required | | Expansion gaps | 2-3mm | 5-8mm | | Fastener type | Any | Stainless steel only | | Cut speed | Fast | Slower (melts if rushed) | | Joinery | Traditional | Modified techniques |
Tools & Equipment
Essential Tools
- Circular saw or mitre saw (sharp blade essential)
- Cordless drill (18V minimum)
- Impact driver (for screws)
- Sharp drill bits (HSS or brad point—for plastic/wood)
- Countersink bit (for flush screw heads)
- Spirit level
- Tape measure
- Square
- Clamps (to hold material while cutting)
Recommended Blades
- 60-80 tooth carbide blade for clean cuts
- Replace blade when cuts become rough
- Slow cutting speed prevents melting
Fasteners (Critical)
- Stainless steel screws only—zinc-plated will corrode
- Deck screws (coarse thread, self-tapping)
- Length: 2.5× material thickness minimum
- Washers: Use for structural connections
Safety Equipment
- Safety glasses (plastic chips can fly)
- Dust mask (plastic dust is irritating)
- Hearing protection
- Work gloves
Cutting Techniques
General Principles
- Always clamp the material securely
- Mark cut line clearly with pencil or chalk
- Cut slowly—fast cutting melts the plastic
- Support both sides of cut to prevent binding
- Let blade do the work—don't force it
Circular Saw Cutting
Step 1: Set Up
- Clamp workpiece to stable surface
- Set saw depth to just below material thickness (~5mm deeper)
- Ensure blade is sharp (60+ teeth)
Step 2: Cutting
- Start saw before blade touches material
- Feed slowly—about half the speed you'd use for timber
- If you smell melting plastic, you're going too fast
- Keep blade perpendicular to avoid binding
Step 3: Finish
- Complete cut without stopping (stopping mid-cut can cause melting)
- Let blade stop completely before removing from cut
- Smooth any rough edges with sandpaper (80-120 grit)
Mitre Saw (Best for Accurate Cuts)
- Ideal for 90° and angled cuts
- Always use stop block for repeat cuts
- Cut even slower than with circular saw
- Perfect for decking boards, fence panels, trim
Hand Saw (Small Cuts Only)
- Use fine-toothed saw (8-10 TPI)
- Very slow going—only for small adjustments
- Not recommended for main cuts
Common Cutting Mistakes
❌ Cutting too fast → Melted edges, rough finish
❌ Dull blade → Tearing, excessive heat
❌ No support → Material flexes, uneven cut
❌ Stopping mid-cut → Melted plastic around blade
Drilling Techniques
Why Pre-Drilling is Essential
Recycled plastic is dense and tough:
- Screws will crack the material if driven without pre-drilling
- Stress cracks appear over time from forced screws
- Pre-drilling ensures longevity
Drill Bit Selection
- HSS (high-speed steel) bits work well
- Brad point bits give cleaner holes
- Slightly larger than screw shaft (not thread)—allows thermal expansion
Drilling Process
Step 1: Mark Hole Position
- Use pencil to mark clearly
- For multiple holes, use template
Step 2: Pilot Hole
- Start drill perpendicular to surface
- Drill at medium speed (too fast = melting)
- Retract drill periodically to clear plastic chips
- Drill completely through material
Step 3: Countersink (for Flush Finish)
- Use countersink bit after pilot hole
- Depth: Just below screw head level
- Creates professional finish
Step 4: Clean Hole
- Remove plastic shavings
- Check hole is clear before inserting screw
Drill Bit Sizes
| Screw Size | Pilot Hole Diameter | | ---------- | ------------------- | | #8 (4mm) | 4.5mm | | #10 (5mm) | 5.5mm | | #12 (6mm) | 6.5mm |
Fastening Methods
Screw Fastening (Most Common)
Screw Selection:
- Stainless steel deck screws (A2 or A4 grade)
- Length: At least 2.5× material thickness
- Thread type: Coarse thread for better grip
Fastening Steps:
- Pre-drill pilot hole (see above)
- Apply small amount of soap to screw thread (lubrication)
- Drive screw slowly with impact driver
- Stop when head is just flush with surface
- Do not over-tighten—can crack plastic or strip hole
Spacing:
- Edge distance: Minimum 25mm from edge
- Fastener spacing: 400mm maximum centres
- End spacing: 50mm minimum from cut ends
Bolt Fastening (Structural Connections)
When to Use:
- Heavy load-bearing applications
- Frame connections
- Gate hinges
- Attachment to posts
Process:
- Drill clearance hole (bolt diameter + 2mm)
- Use stainless steel washers both sides (essential—distributes load)
- Lock washers or nylock nuts to prevent loosening
- Snug tight only—not torqued down hard
Hidden Fastening (Decking)
Clip Systems:
- Specially designed clips for decking
- Attach to side of boards
- No visible screws on walking surface
Advantages:
- Clean appearance
- Faster installation (once you get the hang of it)
- Reduces thermal expansion issues
Disadvantages:
- More expensive
- Harder to replace individual boards
Working with Thermal Expansion
Understanding Expansion
Recycled plastic expands and contracts with temperature:
- Expansion rate: 0.11 mm/m/°C
- Example: 3m board experiencing 40°C temperature swing = 13mm movement
- Typical UK range: -20°C winter to +50°C sun exposure on surface

Expansion Gap Requirements
End Gaps (between board ends):
- 5-8mm minimum for boards up to 3m
- 10mm for boards over 3m
- Use spacers during installation to maintain consistency
Side Gaps (between boards):
- 3-5mm for decking boards
- 2-3mm for fence boards (tighter aesthetic acceptable)
Perimeter Gaps (against walls/buildings):
- 10-15mm minimum
- Allows expansion without buckling
Fastening to Allow Movement
For Long Boards (>2m):
- Fix one end rigidly (both sides)
- Fix middle and far end with slotted holes
- Allows board to expand lengthwise without buckling
Slotted Hole Method:
- Drill elongated hole (6mm × 15mm)
- Use washer and screw
- Tighten just enough to hold—allows sliding
Common Applications & Techniques
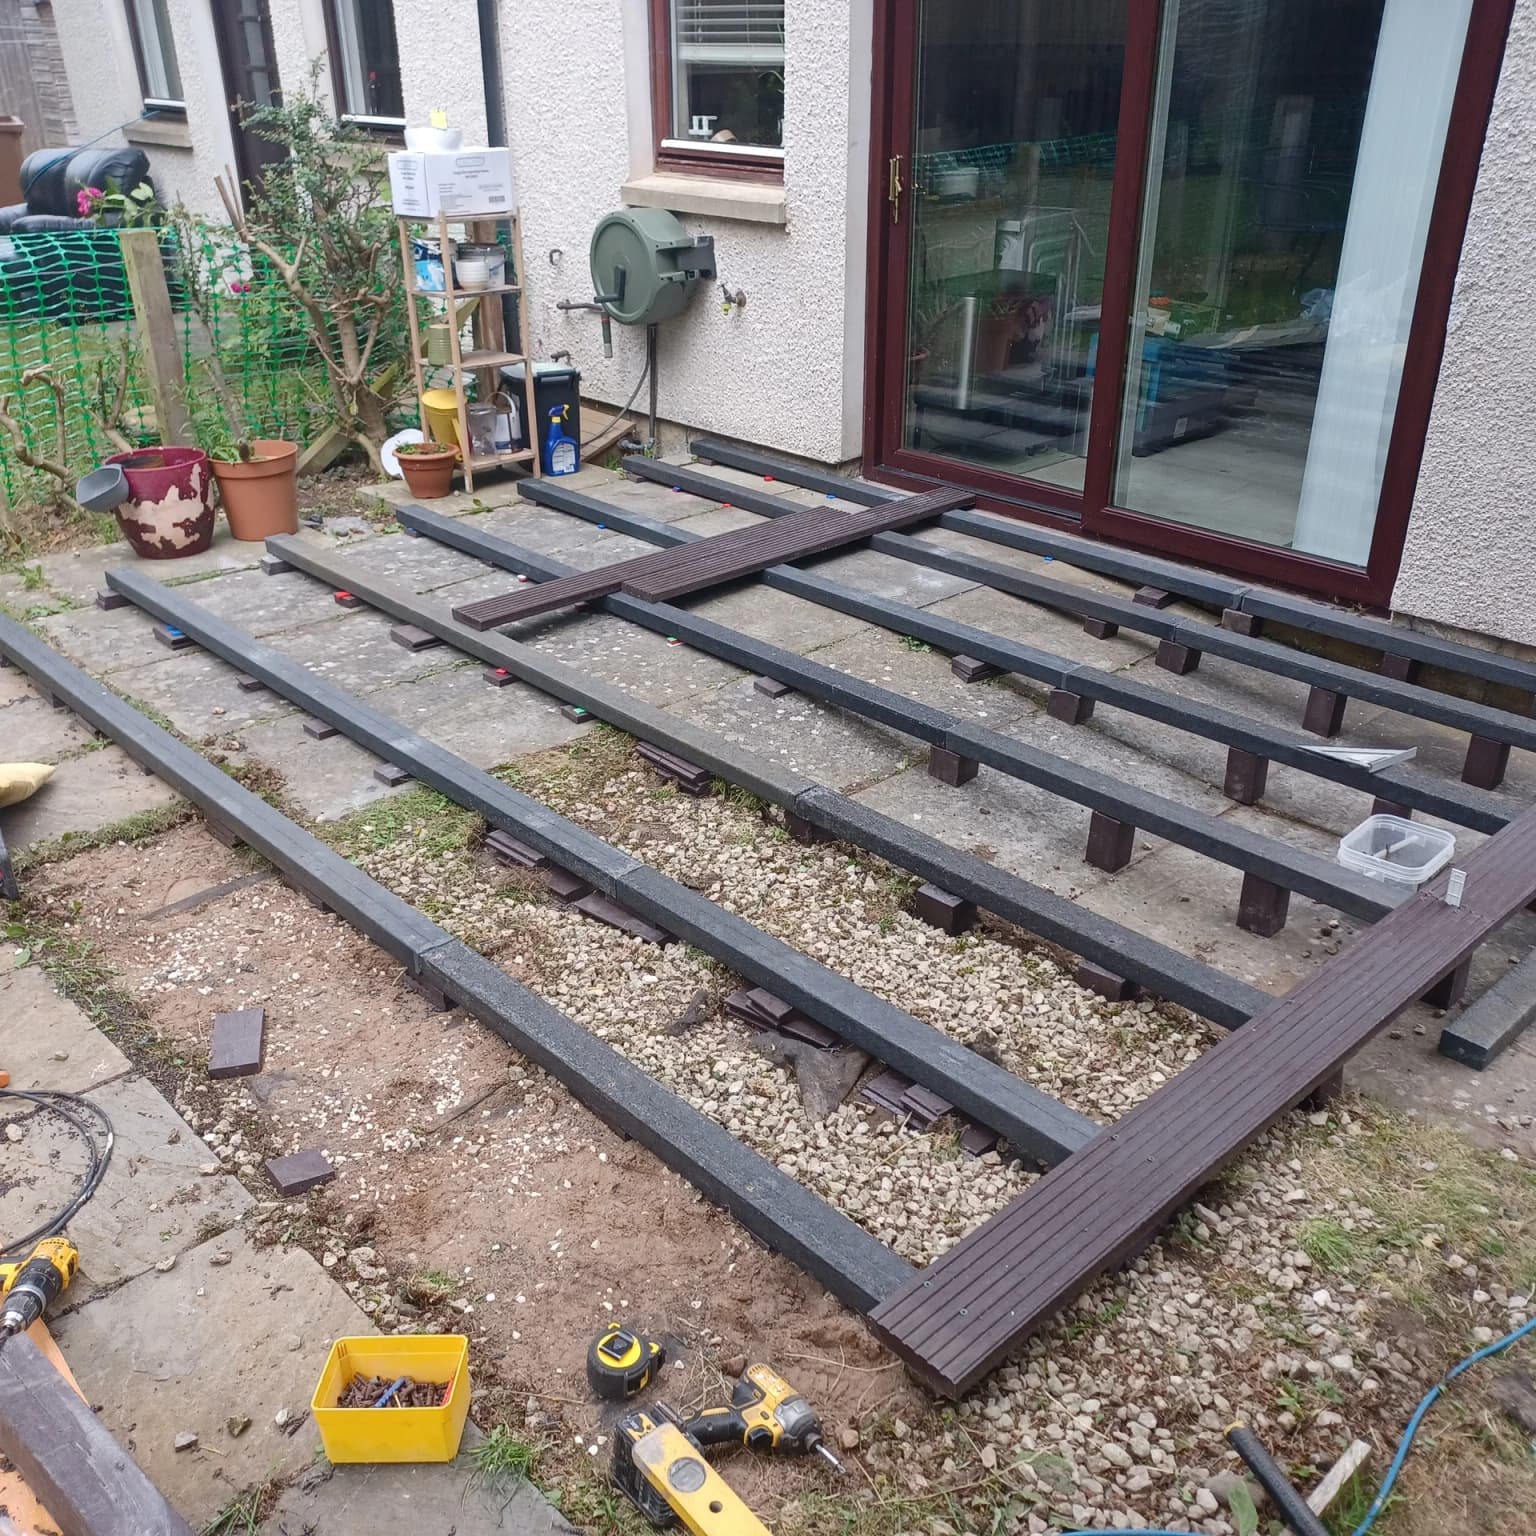
1. Decking Installation
Subframe:
- Recycled plastic joists (recommended) or treated timber
- 400mm centres for 35mm thick boards
- Level and square—use string lines
Board Installation:
- Start at house wall (fixed edge)
- Work outwards
- Maintain consistent gaps with spacers
- Stagger end joins (minimum 300mm apart on adjacent rows)
Finishing:
- Fascia boards cover joist ends
- Trim or capping for clean edges
2. Fencing
Posts:
- Recycled plastic posts (ideal) or concrete with plastic board
- 600mm minimum ground burial (800mm for tall fences)
- Concrete in place or use post spike
Board Installation:
- Horizontal or vertical fixing
- Rails or direct to posts
- Maintain 3-5mm gaps between boards
Gates:
- Use bolted connections (not just screws)
- Diagonal bracing essential
- Heavy-duty stainless hinges
3. Raised Garden Beds
Frame Assembly:
- Mitre corners or butt joins with brackets
- Use stainless bolts for corners
- Internal corner posts add strength
Soil Contact:
- Recycled plastic is completely rot-proof
- No liner needed
- Drainage holes can be drilled in base
4. Outdoor Furniture
Joinery:
- Traditional mortise and tenon doesn't work (plastic flexes)
- Use bolted connections with washers
- Pocket hole screws work well (like timber)
Design Considerations:
- Build in extra strength (plastic flexes more than timber)
- Wider legs for stability
- Cross-bracing essential for tables
Finishing & Maintenance
Surface Finishing
Sanding:
- Use 80-120 grit sandpaper
- Smooth rough cut edges
- Remove burrs around screw holes
Painting (Optional):
- Not necessary (plastic is coloured throughout)
- If desired, use plastic-specific paint
- Clean surface with degreaser first
- Prime with plastic primer
Coating (UV Protection):
- Most recycled plastic lumber has UV stabilizers built-in
- Additional coating not usually needed
- If desired, use clear plastic/PVC coating
Cleaning
Regular Cleaning:
- Hose down with water
- Use mild detergent for stubborn dirt
- Soft brush for textured surfaces
Deep Cleaning:
- Pressure washer (low setting—less than 1500 PSI)
- Do not use harsh chemicals or solvents
- White vinegar solution for algae/mould
Maintenance Schedule
Annually:
- Pressure wash to remove buildup
- Check fastenings (rare—usually no issues)
- Tighten any loose screws/bolts
Every 5 Years:
- Inspect for any cracking (very rare)
- Check expansion gaps haven't closed (adjust if needed)
That's it. No staining, sealing, or treating required—ever.
Troubleshooting Common Issues
Problem: Screws Crack the Material
Cause: No pre-drilling or hole too small
Solution: Always pre-drill with correct size bit
Problem: Screws Won't Tighten
Cause: Hole too large or over-drilled
Solution: Move screw location 50mm away, use larger screw
Problem: Material Splits Along Length
Cause: Edge too close to fastener, no expansion gap
Solution: Follow minimum edge distance (25mm), leave expansion gaps
Problem: Warping/Buckling
Cause: No expansion gaps, boards fixed too rigidly
Solution: Remove and reinstall with proper gaps and slotted fixing
Problem: Rough Cut Edges
Cause: Dull blade or cutting too fast
Solution: Replace blade (60+ teeth), cut slower, sand edges
Problem: Melted Edges on Cuts
Cause: Cutting too fast or stopping mid-cut
Solution: Slow down, complete cuts in one motion
Safety Considerations
Fire Safety
- Recycled plastic is self-extinguishing (does not support combustion)
- Melts rather than burns
- Do not use near open flames or BBQs without clearance
Load Bearing
- Always follow span tables for decking joists
- Don't exceed manufacturer's load ratings
- Use additional supports for heavy loads (hot tubs, planters)
Slip Resistance
- Textured surface provides grip
- Can become slippery with algae buildup—clean regularly
- Not suitable for ramps >15° without additional grip strips
Project Planning Checklist
Before You Start:
- ✅ Calculate material quantities (add 10% waste)
- ✅ Check you have correct tools and fasteners
- ✅ Read all instructions
- ✅ Prepare subframe/foundation
- ✅ Check weather (avoid rain—makes plastic slippery to handle)
During Installation:
- ✅ Pre-drill every screw hole
- ✅ Maintain expansion gaps consistently
- ✅ Don't rush—cut slowly
- ✅ Check square and level frequently
- ✅ Use spacers to maintain uniform gaps
After Installation:
- ✅ Remove all plastic offcuts (don't burn—recycle)
- ✅ Clean surface of any sawdust
- ✅ Check all fastenings are flush
- ✅ Hose down deck/structure
Where to Get Help
Technical Support
Contact Ezotrade for:
- Span tables for your specific application
- Load-bearing calculations
- Custom cutting/fabrication services
- Fastener recommendations
Installation Services
We offer:
- Full installation (UK-wide)
- Partial assistance (we do the tricky bits)
- Site consultation
Resources
- Video tutorials: Step-by-step visual guides
- CAD drawings: Common construction details
- Material calculator: Work out quantities needed
Conclusion: Build Once, Build Right
Recycled plastic lumber represents a fundamental shift in outdoor construction. By following these techniques—particularly pre-drilling every hole and allowing for thermal expansion—you'll create structures that last 50+ years with virtually no maintenance.
Key Takeaways:
- ✅ Always pre-drill (never skip this)
- ✅ Cut slowly with sharp blades
- ✅ Use stainless steel fasteners only
- ✅ Leave expansion gaps (5-8mm ends, 3-5mm sides)
- ✅ Don't over-tighten screws
- ✅ Think about thermal movement in design
Build with confidence knowing your project will outlast timber by decades.
Need materials or installation help? Request a quote or contact our technical team for expert guidance.